Contact Form CF7 Data Storage
- Original file and Document File include
- you received update file life times from us
- Use On Unlimited Site
- Standard Support From Our Experts
- You’ll Receive Untouched And Unmodified Files
$5.00
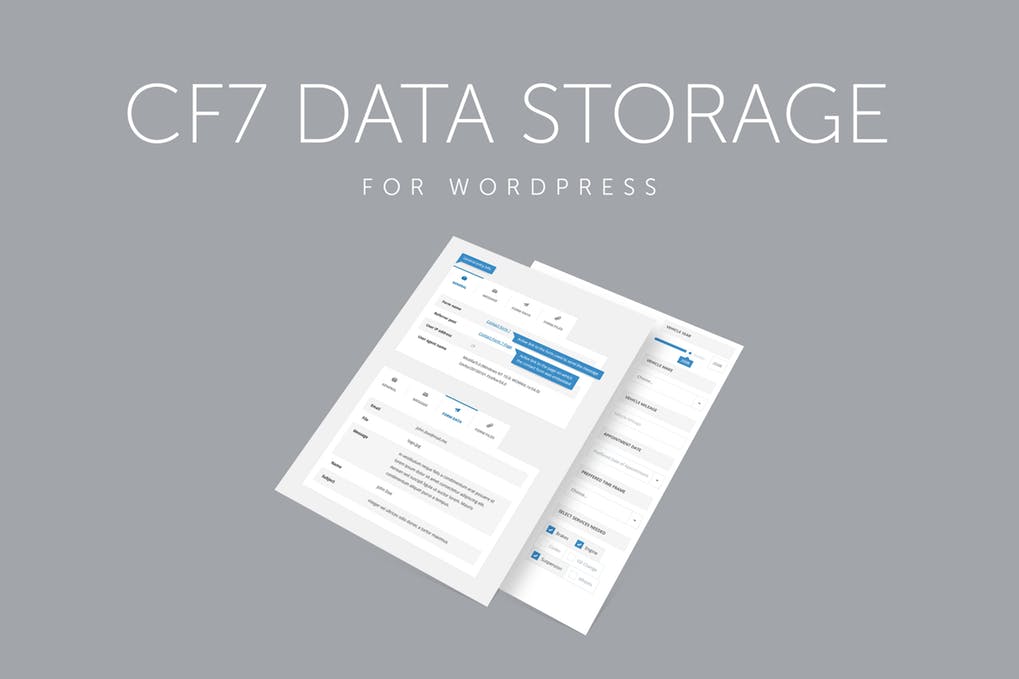
A lightweight WordPress plugin that stores contact form submissions in WordPress database, Contact Form CF7 Data Storage allows you to store, display, manage and export the data sent by forms on your website.
The plugin supports forms build on Contact Form 7, Caldera Forms or Fast Secure Contact Form. All form submissions are stored in WordPress database in addition to being sent via e-mail. This allows you to avoid problems with missing or not delivered emails.
 Latest Version: 22.08.2017 – v1.1.
How to use the plugin?
Supported Plugins
The latest version stores data from contact forms based on these plugins:
Stored Data
The plugin uses native WordPress tables and functions, so you can easily transfer (export, import) data (if it is required) between different WordPress instances. The plugin stores the following data:
- General submission data: form name (which was used to send e-mail message), page name (on which the form was located – called as referrer post), sender user agent, sender IP.
- Message details: sender, receiver, recipients, CC, BCC, reply to (all data in format: name and e-mail address), subject and body of the message.
- Form data: list of form fields and values.
- Form files: list of files attached to the message (files are stored in Media Library).
Main View
The plugin starts collecting data from contact form submissions immediately after activation – no additional setup from admin is required. All entries are stored based on native WordPress functionality, called Custom Post Type and are available under the dashboard menu item MF Data Storage. Under the above-mentioned menu item the user has the ability to:
- Search and filter forms submissions by contact form type, content of message body and the subject.
- Export entries to popular file formats like: CSV and XML,
- Preview content of the messages,
- Use all the other default WordPress functionality (such as deleting entries, performing bulk actions etc.) – the plugin doesn’t limit these options.
Detailed View
Detailed view of entry (which is available by clicking on Edit link) contains all data submitted by end user organized in four tabs: General, Message, Form data and Form files.
Export Options
The plugin allows you to export submitted entries to formats like: CSV (separated by tabs or semicolon) and XML. File with exported data can be created based on query results or by user selection. User is able to control (via Plugin options) names and availability of fields for both types of files.
Requirements
- PHP 5.x (available on all hostings),
- installed at least one of the supported plugins: Contact Form 7, Caldera Forms or Fast Secure Contact Form.
The plugin is compatible with the newest WordPress version.
Translations
The plugin is translated into languages: English, Polish.
Installation
To install the plugin via WordPress dashboard, please follow the steps below:
- Download the plugin (select Installable WordPress file only option)
- Go to WordPress dashboard and navigate to Plugins / Add new.
- Click on Upload plugin button.
- Upload ZIP package from the first point.
- Click the Activate link that appears below the plugin’s title.
To install the plugin via FTP, please follow the steps below:
- Download the plugin (select Installable WordPress file only option) from CodeCanyon to your computer. You will get the file in ZIP file format.
- Unzip it to access the uncompressed files.
- Connect to your server using your preferred FTP application (e.g FileZilla).
- Navigate to the wp-content/plugins folder within the WordPress installation on your website.
- Upload uncompressed plugin to this location via FTP.
- Go to WordPress dashboard and click on Plugins menu.
- Click on Activate link.
- Now your plugin is installed and ready to work.
Please note that plugin is ready to work directly after installation and activation process. No other action or setup is needed.


